How to Download Images from Google Sheets (7 Methods)

Documami expert
Last verified: May 2026 | Applies to: Google Sheets (web, Chrome)
Table of Contents
Trying to get an image out of Google Sheets is one of those tasks that should take ten seconds but somehow ends up costing you twenty minutes. There’s no “Download Image” button. Right-clicking usually doesn’t work. And most guides on the subject either point you toward a paid Chrome extension or describe a method that stopped working two Google updates ago.
This guide covers every method that actually works in 2026 – from a simple keyboard trick for saving a single image to a fully private, no-install solution for bulk downloads. We tested each one against all three image types you’ll encounter in Google Sheets, and we’ll tell you exactly which method to reach for depending on your situation.
Understanding the Three Types of Images in Google Sheets
Before diving into methods, it helps to know what you’re actually dealing with. Google Sheets stores images in three distinct ways, and the extraction method that works for one type often fails completely for another.
1. Floating images (over-cell) These are images that float on top of the spreadsheet grid rather than living inside a cell. You can click and drag them around freely. They were the original way to insert images in Sheets (Insert → Image → Image over cells). A simple right-click usually works for these.
2. Embedded cell images These images are locked inside a specific cell and resize when you change the row or column dimensions. They’re inserted via Insert → Image → Image in cell. This is the newer, more common format – and it’s the one that trips people up most, because a direct right-click just gives you cell options, not image options.
3. Formula-based images (=IMAGE()) These aren’t really “stored” in the sheet at all. The =IMAGE("URL") formula simply pulls an image from a publicly accessible web URL and displays it in the cell. If your images were added this way, extraction is trivial – just click the cell, copy the URL from the formula bar, and open it directly in your browser. No special method required.
The methods below are primarily for types 1 and 2. When the distinction matters, we call it out explicitly.
Quick-Pick Comparison Table
Not sure which method to use? This table covers the key decision factors at a glance.
| Method | Best for | Works on in-cell images? | Bulk download? | Privacy | Difficulty |
|---|---|---|---|---|---|
| Shift + right-click | 1–2 floating images | ❌ No | ❌ | ✅ Nothing shared | Easy |
| "Put over cells" trick | 1–2 in-cell images | ✅ Yes (one at a time) | ❌ | ✅ Nothing shared | Easy |
| Download as Web Page (.zip) | All images, any type | ✅ Yes | ✅ | ✅ Nothing shared | Easy |
| Download as .xlsx + Documami | Bulk, sensitive data | ✅ Yes | ✅ | ✅✅ 100% client-side | Easy |
| Show Edit History | Single image (URL-sourced) | ✅ Yes (if URL-inserted) | ❌ | ✅ Nothing shared | Easy |
| Google Apps Script | Automated / developer workflows | ✅ Yes | ✅ | ⚠️ Saves to Drive | Advanced |
| Chrome extension | Quick bulk (if you trust it) | ✅ Yes | ✅ | ⚠️ Requires Google auth | Easy |
Method 1: Shift + Right-Click (Fastest – Floating Images Only)
Works on: Floating (over-cell) images only Time: ~10 seconds What you need: Just a browser
This is the fastest way to save an image from Google Sheets when it works – which is only for images that float above the grid, not those locked inside cells.
Steps:
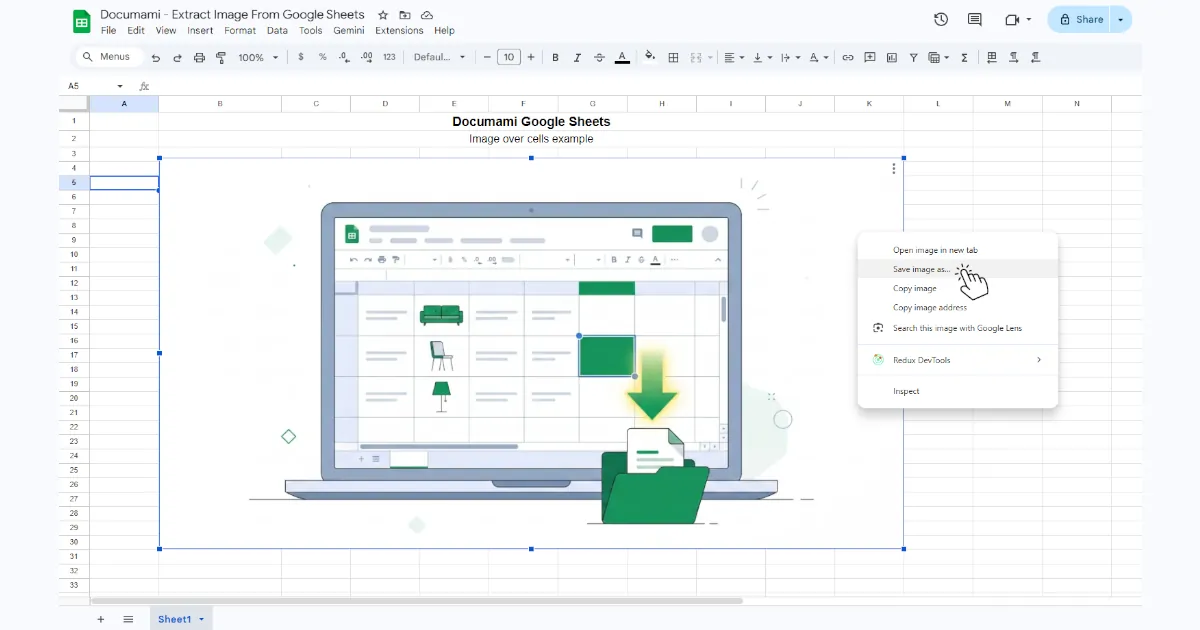
- Click the image once to select it (you’ll see blue handles appear around it).
- Hold down Shift on your keyboard.
- Right-click the image while holding Shift.
- Select “Save image as…” from the context menu.
- Choose your save location and click Save.
The Shift key is the key here – without it, right-clicking a selected image in Chrome gives you spreadsheet options (insert row, format cell) rather than browser image options. Holding Shift forces the browser to treat the click as a native image interaction.
Limitation: This will not work if the image is embedded inside a cell. If you right-click and only see cell-level options (no “Save image as”), you have an in-cell image – move to Method 2.
Method 2: The “Put Image Over Cells” Trick (How to Save In-Cell Images, One at a Time)
Works on: Embedded in-cell images Time: ~30 seconds per image What you need: Just a browser
This is the most important method to know, because in-cell images are now the default in Google Sheets and most guides either skip this entirely or explain it poorly.
The trick temporarily converts an in-cell image into a floating image, lets you download it, then you put it back.
Steps:
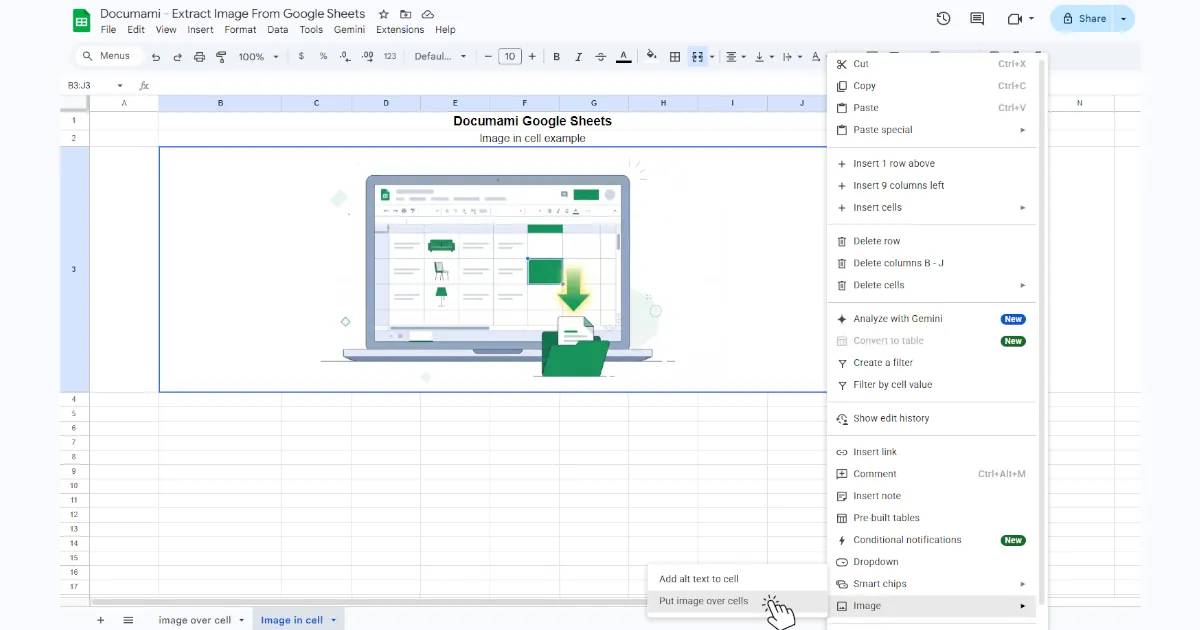
- Right-click the cell containing the embedded image.
- In the context menu, hover over “Image” or look for “Put image over cells” – this moves the image from inside the cell to floating above it.
- The image is now floating. Hold Shift, right-click the image, and select “Save image as…”.
- Once saved, right-click the image again and select “Put image in cell” to restore it to its original position.
Screenshot tip: After step 2, the image will appear slightly offset from its original cell – this is normal. The image data hasn’t changed, only its display mode.
Limitation: This works one image at a time. If you need to download 10, 20, or 50 images, this will get tedious fast. Jump to Method 3 or Method 4 for bulk downloads.
Method 3: Download as Web Page (.html Zip File)
Works on: All image types (floating and in-cell) Time: 2–3 minutes What you need: Just a browser + ability to unzip files
Google Sheets can export your spreadsheet as a zipped HTML file, and that zip package contains all the images as separate files. Nothing is sent to a third party – the export and unzip happen entirely on your machine.
Steps:
- Open your Google Sheet.
- Go to File → Download → Web Page (.html, zipped).
- Save the .zip file to your computer.
- Unzip the file (right-click → Extract All on Windows; double-click on Mac).
- Open the extracted folder. You’ll find an
images/subfolder containing all your images.
What works well: This reliably downloads every image in the sheet, including in-cell images. It requires no additional tools and works on any operating system.
The catch – scrambled file names: When you export as a Web Page, Google Sheets strips the original image file names and replaces them with random strings like:
image001.png, image002.jpg, image003.png.
There is no metadata linking each downloaded image back to its original cell location or row. If you have 50 product images that need to stay associated with their SKU or row data, this method will create a serious organisational headache – you’ll have no way to know which image came from which row without manually cross-referencing.
If you need your images to stay organised, skip this method and use Method 4. The XLSX method produces the same result (full-quality images, no server upload) without the naming chaos.
This method works well for quick one-off bulk saves where you don’t care which image came from where – for example, archiving all visuals from a sheet you’re about to delete.

Method 4: Download as .xlsx + Free Online Extractor (Best for Bulk – 100% Private) ⭐
Works on: All image types (floating and in-cell) Time: 3–4 minutes What you need: A browser – no installation, no Google account required
This is the method we recommend for anyone who needs to bulk download images from Google Sheets without installing an extension, without sharing your Google account credentials, and without getting a folder of randomly named files.
The underlying reason this works: an .xlsx file is technically a zip archive containing XML files and a media/ folder with every embedded image at full quality. The Documami tool reads that structure entirely inside your browser – your file never leaves your device.
Steps:
Step 1 – Export your sheet as .xlsx
- In Google Sheets, go to File → Download → Microsoft Excel (.xlsx).
- Save the file to your computer.
Step 2 – Download the images
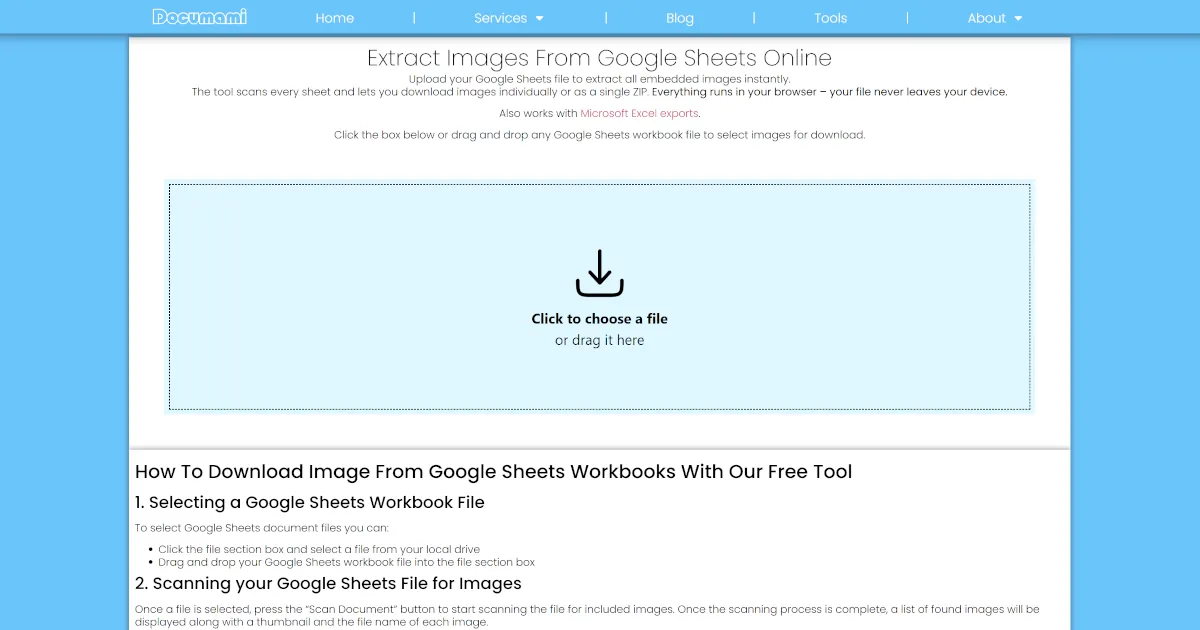
- Open our free Google Sheets image extractor at Documami.
- Drag and drop your .xlsx file onto the upload area, or click to browse for it.
- Click “Scan Document”.
- A thumbnail preview of every image in the file will appear. Use the checkboxes to select the ones you want, or click “Select All”.
- Click “Download”. If you selected multiple images, they’ll arrive as a single .zip file with the original file names preserved.
Why this is the most private way to download images from Google Sheets:
⚠️ Privacy note: Several methods in this guide – particularly Chrome extensions and Google Apps Script – require granting access to your Google account or Google Drive. The
.xlsx+ Documami method is the only bulk download approach that operates entirely within your browser. Your spreadsheet data is never uploaded to any server, never processed remotely, and never touches your Google account. This matters if your spreadsheet contains employee data, client records, medical information, or any other content you’d rather not pass through a third-party service.
Supported formats: The tool also works with .xls, .ods, and .xlsm files – so if you’re working from a downloaded Excel file rather than a Google Sheet, the same workflow applies.
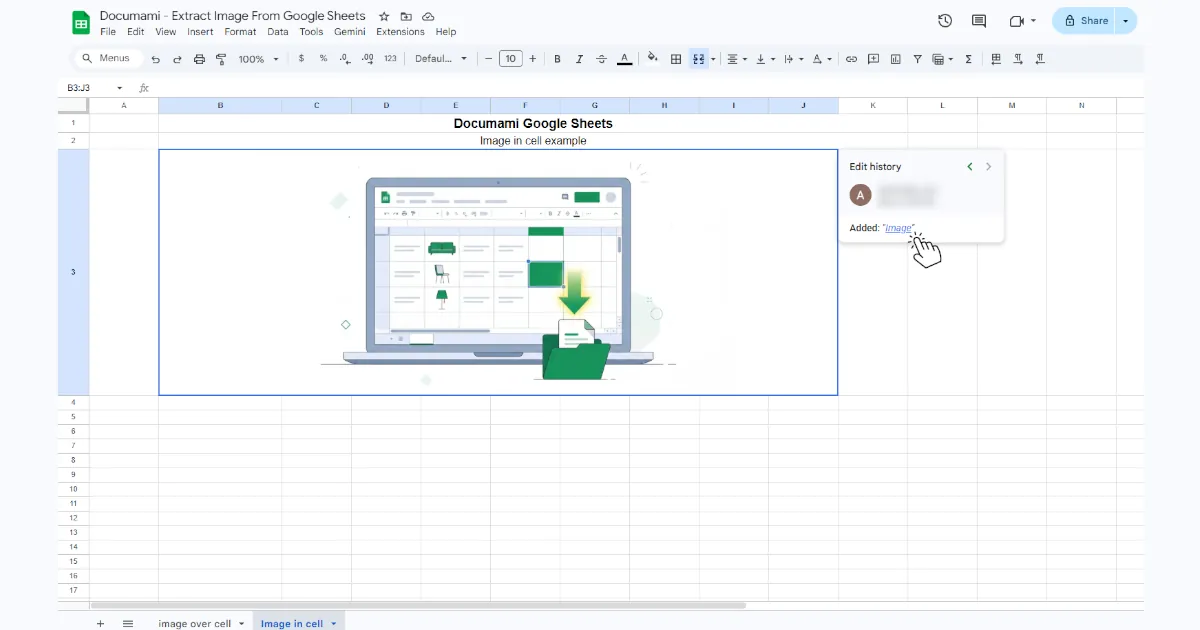
Method 5: The “Show Edit History” Trick (URL-Inserted Images)
Works on: Images inserted via URL (less common) Time: ~15 seconds per image What you need: Just a browser
This is a niche but genuinely useful trick that most guides miss entirely. It works specifically for images that were inserted by pasting an image URL – not for uploaded image files.
Steps:
- Right-click the cell containing the image.
- Select “Show edit history” from the context menu.
- In the edit history panel that appears, you’ll see who inserted the image and – crucially – a clickable link to the original image URL.
- Click that link to open the image in a new tab, then save it normally.
When this helps: If a colleague populated your sheet by pasting image URLs (common in product catalog workflows), this surfaces the original source URL without any export step. It also tells you when the image was added and by whom, which can be useful for audit purposes.
Limitation: If the image was uploaded as a file (rather than inserted as a URL), the edit history shows the insertion event but not a usable image link. In that case, use Method 3 or Method 4.
Method 6: Google Apps Script (For Technical Users and Automated Workflows)
Works on: All image types Time: 10–15 minutes to set up; seconds to run after that What you need: Google account with Sheets access; basic comfort with code If you regularly need to download images from Google Sheets as part of an automated pipeline – say, a weekly product catalog export – Apps Script is worth the setup time. Important caveat first: You will find many guides and Stack Overflow answers recommending an Apps Script method that usesSpreadsheetApp.getActiveSheet().getImages().getUrl() call. Do not use this. Google deprecated the getUrl() method on the OverGridImage class, and it now returns null for virtually all images inserted after a certain point. Scripts built on this approach silently fail or return empty results. The working approach for in-cell images uses the Drive API to access the underlying file structure – similar to what the XLSX method does, but programmatically. A working script for saving images to Google Drive:To run this script:function downloadImagesToDrive() { const ss = SpreadsheetApp.getActiveSpreadsheet(); const file = DriveApp.getFileById(ss.getId()); const blob = file.getBlob(); // The spreadsheet blob is actually a zip archive const zipBlob = Utilities.newBlob(blob.getBytes(), 'application/zip', 'sheet.zip'); const unzipped = Utilities.unzip(zipBlob); // Find image files in the xl/media/ folder const folder = DriveApp.createFolder('Extracted Images - ' + new Date().toLocaleDateString()); let count = 0; unzipped.forEach(function(file) { if (file.getName().startsWith('xl/media/')) { const imageName = file.getName().split('/').pop(); folder.createFile(file.setName(imageName)); count++; } }); SpreadsheetApp.getUi().alert('Done! ' + count + ' image(s) saved to Drive folder: "' + folder.getName() + '"'); }
- In your Google Sheet, go to Extensions → Apps Script.
- Delete any existing code and paste the script above.
- Click Save, then click Run.
- Grant the permissions it requests (Drive access is required to create the output folder).
- Check your Google Drive for a new folder called “Extracted Images – [date]”.
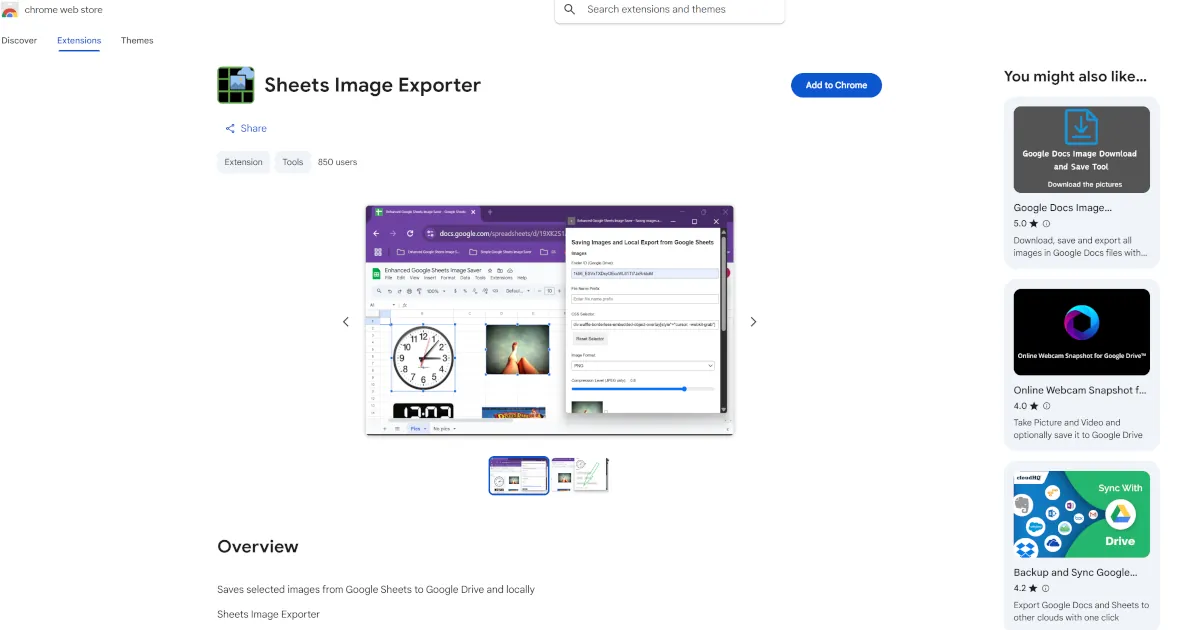
Method 7: Chrome Extension (Quick, but Read the Privacy Warning First)
Works on: All image types visible in the browser Time: 2–3 minutes after installation What you need: Chrome browser; Google account
Several Chrome extensions – including Sheets Image Exporter – can extract images directly from the Google Sheets interface by reading the browser’s DOM rather than the file itself.
⚠️ Privacy warning before you install: Chrome extensions that work with Google Sheets typically require you to authenticate with your Google account and grant access to Google Drive. This means the extension developer’s infrastructure – or any future owner of that extension – could potentially access your Drive. The extension may also upload images to a remote server as part of its processing pipeline. For spreadsheets containing personal data, client information, or anything commercially sensitive, this is a meaningful risk. If privacy matters for your use case, use Method 4 instead.
If you decide to proceed:
- Install Sheets Image Exporter from the Chrome Web Store.
- Open the Google Sheet containing your images.
- Click the extension icon in your Chrome toolbar.
- Use the checkboxes to select the images you want.
- Choose “Download Locally” for a zip file, or “Save to Drive” to send them to a Google Drive folder.
Note: Extensions operate by reading image elements directly from the rendered page. This means they capture what the browser has rendered – which is the image as Google Sheets currently displays it – rather than the original file. For most use cases this is identical, but if you’re concerned about lossless quality, the XLSX method (Method 4) extracts the original file directly.
Privacy Comparison: What Each Method Exposes
| Method | Data leaves your device? | Google account access required? | Third-party server involved? |
|---|---|---|---|
| Shift + right-click | ❌ Never | ❌ No | ❌ No |
| Put over cells trick | ❌ Never | ❌ No | ❌ No |
| Web Page (.zip) | ❌ Never | ❌ No | ❌ No |
| XLSX + Documami | ❌ Never | ❌ No | ❌ No (100% client-side) |
| Show Edit History | ❌ Never | ✅ Signed in to Sheets | ❌ No |
| Apps Script | ⚠️ Saved to Google Drive | ✅ Full Drive access | ⚠️ Google infrastructure |
| Chrome extension | ⚠️ Depends on extension | ✅ Google OAuth required | ⚠️ Likely (varies by extension) |
For most people saving images from a casual spreadsheet, any method is fine. For anyone working with HR data, client databases, medical records, financial models, or any spreadsheet your organisation would classify as sensitive - the top four methods in this table are the only ones worth considering.
Summary
For a single floating image: Shift + right-click (Method 1) – done in seconds.
For a single in-cell image: “Put over cells” trick (Method 2) – one extra step.
For bulk downloads with full privacy: XLSX + Documami (Method 4) – the best option for sensitive data, corporate environments, or anyone who wants clean, organised files.
For a quick bulk save where privacy is not a concern: Web Page .zip (Method 3) – fast, but expect randomly named files.
For automated pipelines: Apps Script (Method 6) – requires technical comfort and Drive access.
For quick bulk with an extension you trust: Chrome extension (Method 7) – easy, but read the OAuth warning first.
The most important thing to know going in: if your images are in-cell (the newer default format in Google Sheets), the simple right-click won’t work. Pick a method from the “Works on in-cell images” column of the comparison table above, and you’ll have your images downloaded in minutes.
Frequently Asked Questions
Can I download all images from a Google Sheet at once?
Yes – Methods 3, 4, 6, and 7 all support bulk downloads. For most users, the XLSX + Documami method (Method 4) is the easiest bulk option that doesn’t require any installation or Google account access. The Web Page zip method (Method 3) also works well if you don’t need to know which image came from which row.
Why isn't right-clicking working on my image?
If right-clicking the image gives you cell options instead of “Save image as”, the image is embedded inside the cell (in-cell type), not floating above it. Use Method 2 – right-click the cell, select “Put image over cells”, then Shift + right-click the image that appears.
Does this work on mobile (iOS/Android)?
Mostly no. The right-click methods require a desktop browser. The Google Sheets mobile app doesn’t support the “Put image over cells” action, and Chrome extensions don’t work on mobile. Your best option on mobile: open Google Sheets in a desktop browser via your phone’s “Request desktop site” option, which makes the right-click methods accessible. For bulk downloads on mobile, open the Google Sheets URL on a desktop device and use Method 3 or Method 4.
Will the downloaded images lose quality?
No, if you use the right method. The XLSX method (Method 4) and the Web Page zip method (Method 3) both download the original image files at full quality – nothing is re-compressed. The Shift + right-click method and the Chrome extension method save what the browser has rendered, which is typically identical to the original but may differ in edge cases. Screenshot-based approaches will lose quality if you zoom in – avoid these for anything other than quick reference captures.
My Apps Script isn't finding any images. Why?
You’re probably using an older script that calls `.getUrl()` on the `OverGridImage` object. Google deprecated this method, and it now returns `null` for most images. Use the script in Method 6 above, which accesses images via the file’s zip structure rather than the deprecated API.
Can I download images from a Google Sheet I don't own?
Only if you have at least Viewer access to the sheet. For Methods 3 and 4, you’ll need Viewer access to download the file. For Method 5 (Edit History), you need at least Commenter access. For Apps Script, you need Editor access to run scripts on the sheet.
Does the XLSX method work for Excel files too (not just Google Sheets)?
Yes. The Documami tool works with `.xlsx`, `.xls`, `.xlsm`, and `.ods` files directly – you don’t need to go through Google Sheets at all. If you have a Microsoft Excel file with embedded images, you can upload it to the tool directly.
Tested by the Documami team, April 2026. We build free browser-based document tools at documami.com. The image extractor referenced in Method 4 is our own tool – we’ve included it alongside every other viable method so you can make an informed choice.